Hello everyone!
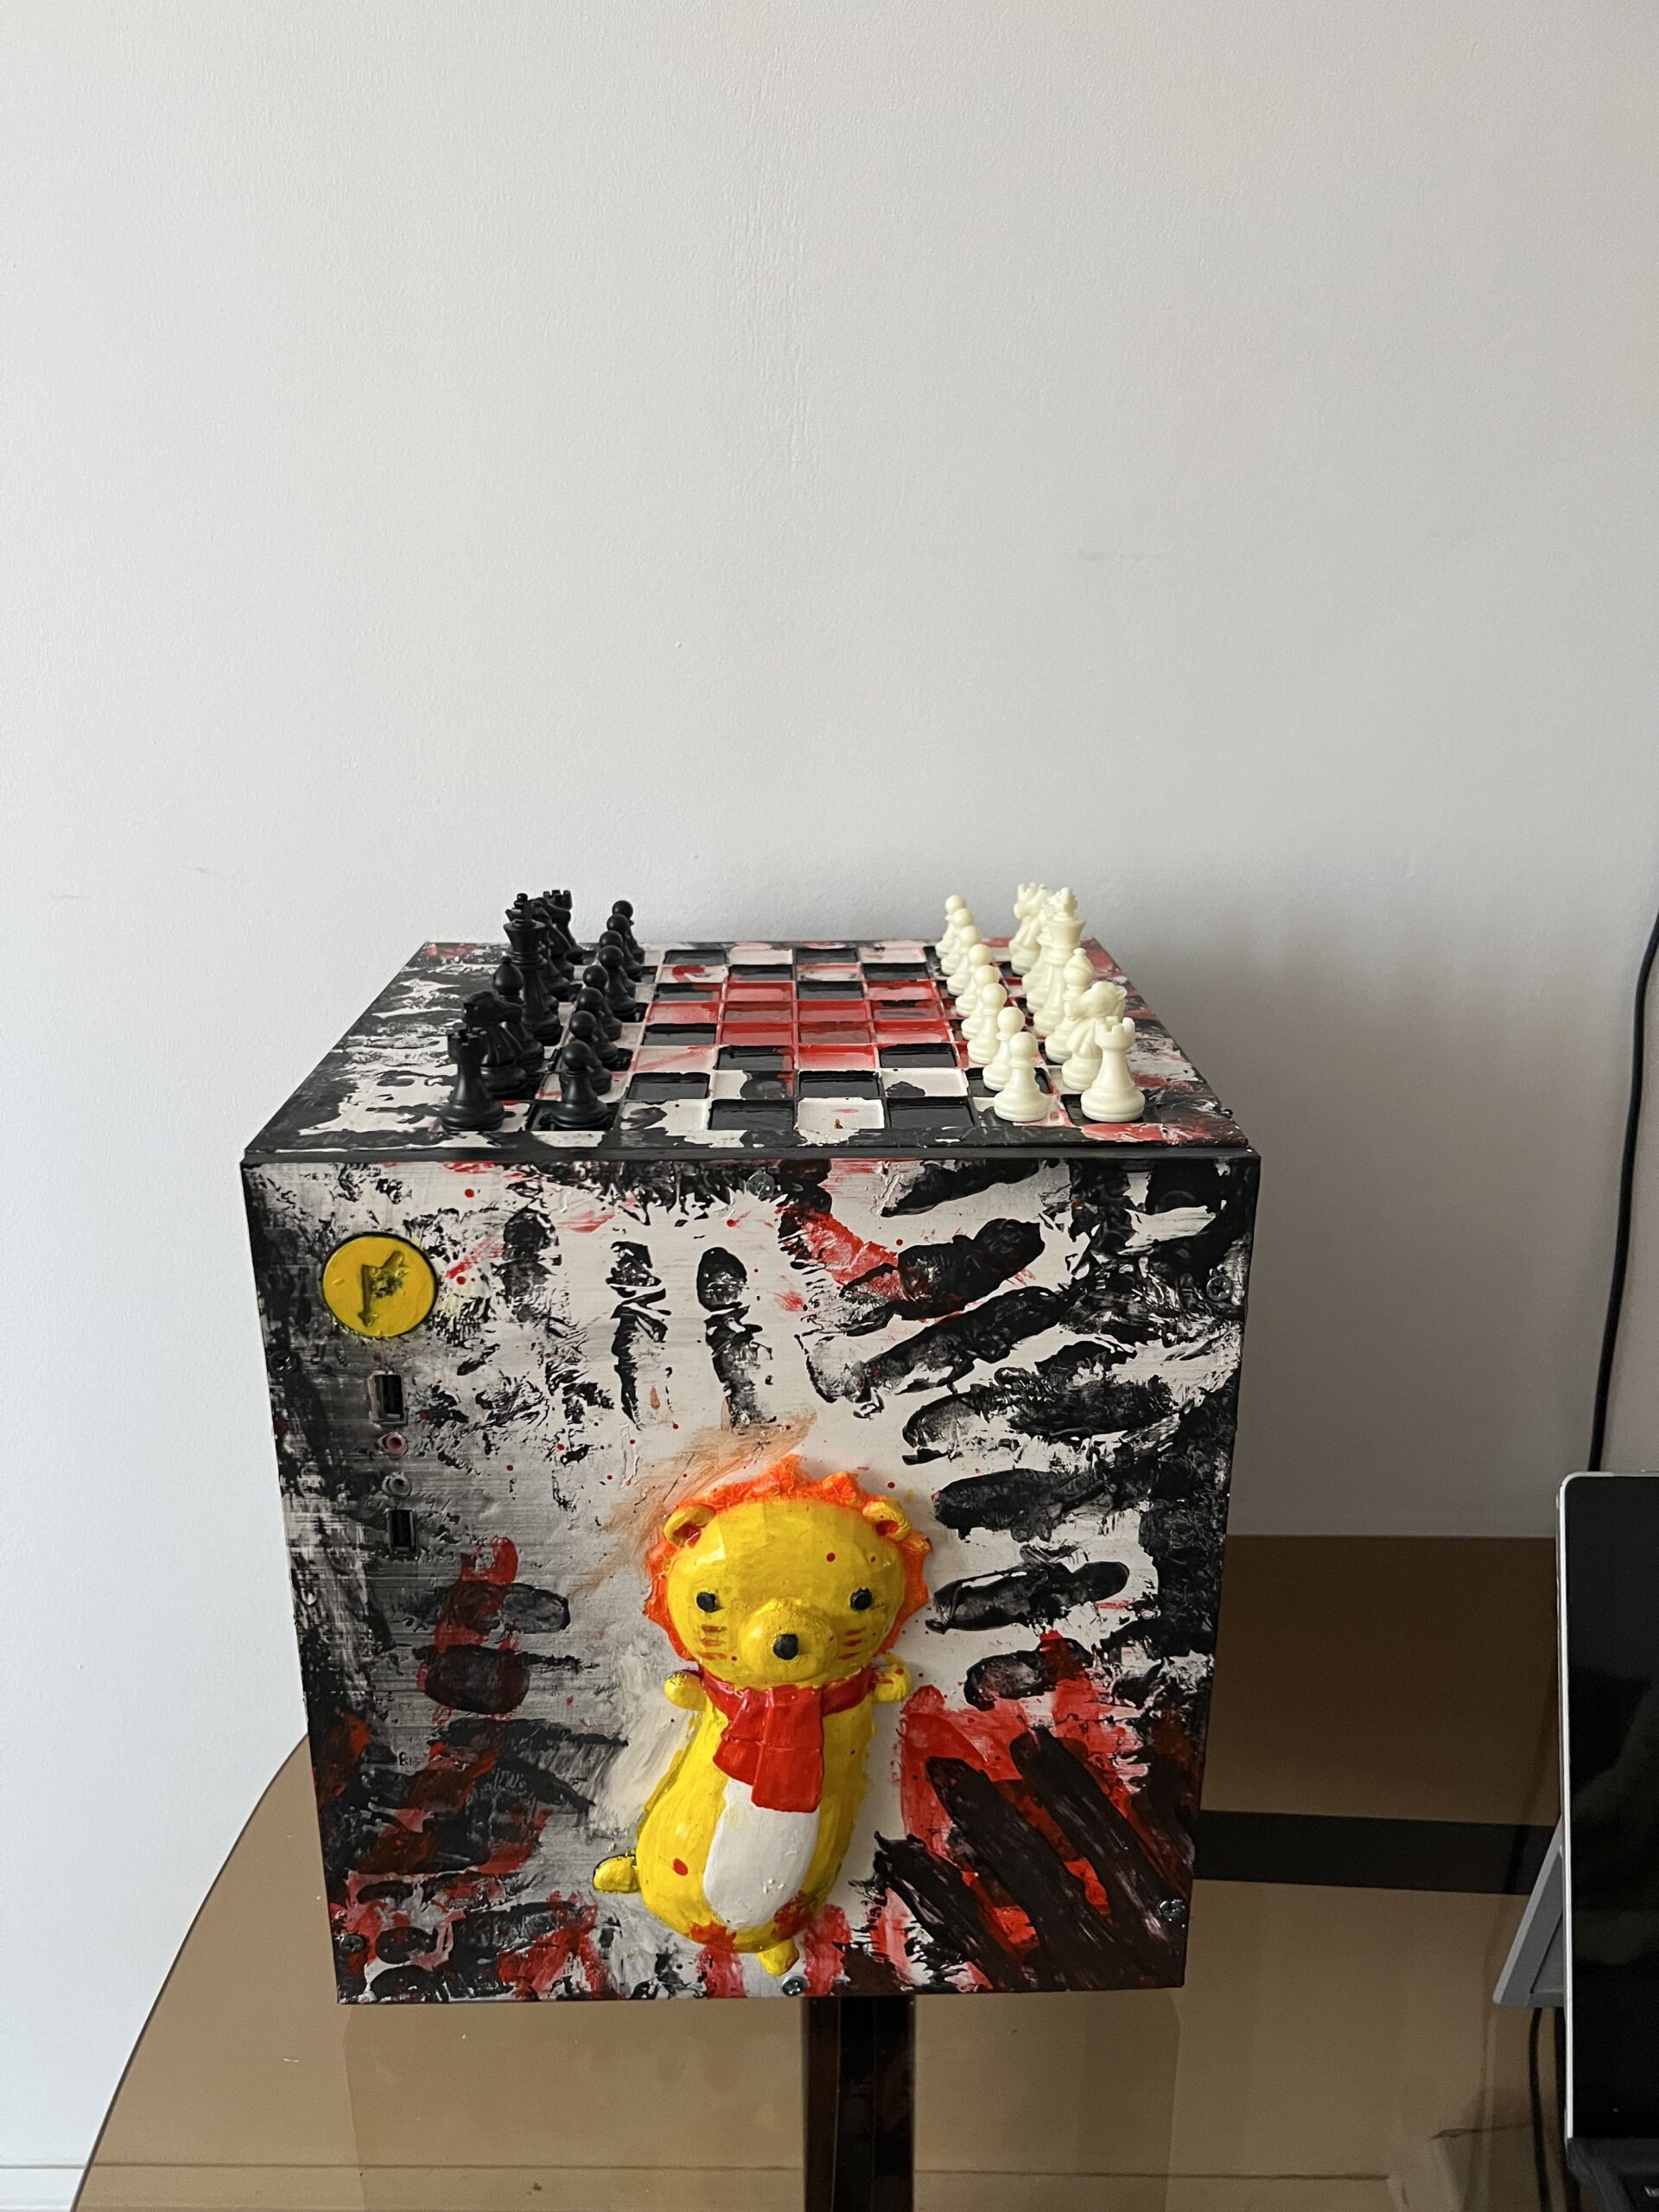
Today I want to share how I built my custom 3D printed micro-ATX PC case. This project took quite a bit of time and patience, but the final result was absolutely worth it.
Below you can find the parts used, the materials for printing, and the build process.
Parts List
Here are the components I used for the PC build. You can use different hardware if you want—this is just the setup I had available.
●◄► Umineko PC ◄►●
CPU
Intel® Core™ i5-4460 — 3.2 GHz
CPU Cooler
ID-Cooling DK-03i RGB PWM
GPU
KFA GeForce® GTX 1060 OC — 6GB GDDR5 (192-bit)
Motherboard
MSI B85M-E45 — Socket 1150 (mATX)
RAM
HyperX Fury Black — 24GB DDR3 1600 MHz CL10
Storage
Kingston A400 — 960GB SATA III (2.5″)
Power Supply
nJoy Freya 600 — 600W ATX PSU (Active PFC, RGB)
Other hardware
-
Motherboard standoffs
-
PC screws for mounting components
3D Printing Materials
To print the case I used:
-
~2.5 meters of PLA filament
-
1 Hot Glue Gun
-
Glue sticks
-
Ventilation mesh
-
A 3D printer (I used an Ender 5 Pro)
Build Process
Printing the Parts
Each piece of the case must be printed separately.
For my prints I used:
-
10% infill
You can increase the infill if you want a stronger case, but it will increase print time.
This project requires a lot of printing time.
In my case, the printer ran for almost 12 days non-stop.
⚠️ One important thing to keep in mind:
If a print fails, you will likely need to start that piece again, which can add many more hours to the project.
Assembly
After printing all the parts, the next step is assembly.
My printer wasn’t perfectly calibrated, so I had to manually adjust some holes inside the case so the motherboard would fit correctly.
Making the Mounting Holes
A simple method works surprisingly well:
-
Heat the tip of a small nail.
-
Carefully press it where the hole needs to be.
-
Repeat for all mounting points.
Just make sure you plan the hole placement carefully before doing this.
Once the motherboard holes were done, I installed the rest of the components. The process is fairly straightforward:
-
Mount the motherboard
-
Install the GPU
-
Add the power supply
-
Route the cables
For the SSD, I simply glued it to the inside wall of the case using hot glue.
Ventilation and Dust Protection
To prevent dust from entering through the ventilation holes, I installed fine mesh over the openings.
This mesh is inexpensive and can easily be found in most hardware or online stores.
Proper airflow is very important, because PLA can deform if exposed to too much heat.
Because of this, I recommend using energy-efficient components and avoiding very high-power hardware inside a PLA case.
Final Thoughts
This project took a lot of time but was a fun and rewarding DIY build. A fully 3D-printed PC case is a great project if you enjoy:
-
3D printing
-
PC building
-
Custom hardware projects
Just be prepared for long print times and some trial and error.


This is fire 🔥🔥🔥
this is so tuff